Introduction
In this article I go over the full build out of an ajax-enabled Django widget. Although I will walk through all of the steps necessary to create this widget, this article does assume you have at least some understanding of Django, ajax, and JavaScript.Check out some of our other Django-centric articles: with Docker, with another Open Source project, and finally dockerizing an existing project.It seems like at least every other project I work on could benefit from some ajax-enabled control, and Django doesn’t have an out-of-the-box solution for this. As a result, I find myself building some permutation of an ajax-widget every couple of months. So I’ve decided to write a guide to developing these widgets in case anyone else out there routinely bumps into this problem.

You can clone the repo for this and other (future) tutorials over from our Bitbucket.
https://bitbucket.org/accendero/django-tutorials
For the purposes of this tutorial, all of the code we will cover is under the
ajax_widget app.
Use Case
Ajax-enabled controls generally help to lower the complexity of user workflows. Also, they tend to offer a more seamless and performant user experience. This is due to the fact that ajax-enabled controls are able to request data on their own and don’t require a full page-refresh from the server. Consider that you have a view with a text field and a select list. What you’re trying to build is when the user enters data into the text field, the options available in the select list change. In this case, the text field is going to act not just as a simple filter, but will act as the only mechanism by which options will be available to the user. What this means is that the initial state of the select list will be empty. The current Django way of handling this is to add the fields to your form and make the select list not required. You will need to create branching logic in your view to handle the two different scenarios: a) when the user has only submitted a search, and, b) when the user has submitted a selection from the select list. For option a), you will need to gather the results and pass them back down into context with your render. For option b), you will need to validate the selection and commit any changes. Using an ajax-enabled control here allows us to have a single scenario within the context of our form: case b) from above.Overview
An ajax-enabled Django widget is comprised of several different elements: widget, ajax view, form, javascript, widget template, view template, and finally the user-facing view. It sounds complicated, but really we’re mostly just concerned with the widget, ajax view and javascript– all the other components are pretty standard Django. We are building a search field control that will query our application for a list of users where their username contains our search term.


The Widget
A widget serves as a way to combine template and media elements. Thus, our widget is, at its most basic, just a way to tell Django which presentation elements to use to display a field. Here’s the code:class AjaxSearchListField(forms.widgets.TextInput):
template_name = 'ajax_search_list.html'
_widget_js = [
'js/jquery.js', # This comes from django-jquery package
'js/ajax/init.js', # This is boilerplate code from Django
'js/ajax/widgets/searchListField.js',
]
def __init__(self, *args, **kwargs):
attrs = kwargs.pop('attrs')
# include any additional js for widget
self._widget_js += attrs.pop('widget_js', [])
kwargs['attrs'] = attrs
super().__init__(*args, **kwargs)
@property
def media(self):
return forms.Media(js=self._widget_js)mediaproperty will be used by Django to include any css or javascript for the ajax-enabled django widget.
The Form
Our user search view has a couple of fields. The first is the ajax enabledsearch_field. Next is selected_userswhich gets updated by the ajax field. It’s pretty simple and the only outstanding part of it is the attributes we pass into the ajax-enabled Django widget.
class SelectUserForm(forms.Form):
    search_field = forms.CharField(
        widget=widgets.AjaxSearchListField(attrs={
            'data-field-name': 'selected_users',
            'data_field_name': 'selected_users',
            'data-option-function': 'createUserOption',
            'data_ajax_url': 'get_user_list',
            'widget_js': (
                'js/ajax/widgets/createUserOption.js',
            )
        }),
        required=False,
    )
    selected_users = forms.ModelMultipleChoiceField(
        queryset=User.objects.all(),
        widget=forms.MultipleHiddenInput(),
)data-field-name, data_field_name, data-option-function, data_ajax_url, widget_js.
data-field-nameis an attribute which is unpacked directly in our html template and attached to our search field input as a data attribute.data_field_nameshadows the attribute above, but is more accessible in the template since we cannot have field names in a template that have hyphens in them. This is kind of a work-around but I haven’t found a cleaner way to do it.data-option-functionis the name of the function we will call to pass each result from our ajax request into. This function will then render the result somewhere.data_ajax_urlis the url we issue our ajax query to; it gets remapped to thedata-widget-ajax-urlattribute of our search field.widget_jsis an iterable of additional JavaScript includes that our widget should import. In this case, it imports the script which has our option rendering function.
The JavaScript
We have three JavaScript includes for our ajax-enabled Django widget. One of them,init.js is more or less boilerplate pulled from the Django website– you can find it here. Next, we have searchListField.js and createUserOption.js. The former script is our main widget JS and the latter provides a way for our ajax results to be rendered. Let’s first take a look at searchListField.js.
searchListField.js
function ajaxSearch(e) {
    e.preventDefault();
    var url = $(this).data('widget-ajax-url');
    var field = $(this).data('field-name');
    var opt = window[$(this).data('option-function')];
    var post = {};
    var fieldName = this.name;
    post[fieldName] = $(this).val();
    var target = $(this).siblings('.widget-ajax-results');
    // remove existing selections
    $(target).empty();
    // add new options
    $.post(url, post, function(options) {
        options.forEach(function(option, idx) {
            opt(option, idx, field, target);
        });
    }, 'json');
}

function checkEnter(event) {
    if (event.key === 'Enter') {
        event.preventDefault();
        ajaxSearch.bind(this)(event);
    }
}

$(document).ready(function() {
    var search = $('.widget-ajax-search-text-field');
    search.on('blur', ajaxSearch);
    search.on('keydown', checkEnter);
});
widget-ajax-url, field-name, option-function (Notice that when we set these attributes, they had a prefix of data- but now each of these has had the data- prefix removed. This is a feature of jQuery and you can see more about it here).
Next, we find and clear out our results target. After that, we post our query to widget-ajax-url. That request will return a json string of results. Notice the final argument to our $.post(...) method: 'json'. This tells jQuery that we expect the results to be json, so it will automatically parse them for us.
The next part of our script acts as a way to run the search when the user presses the Enter key in our search field:
function checkEnter(event) {
    if (event.key === 'Enter') {
        event.preventDefault();
        ajaxSearch.bind(this)(event);
    }
}
$(document).ready(function() {
    var search = $('.widget-ajax-search-text-field');
    search.on('blur', ajaxSearch);
    search.on('keydown', checkEnter);
});option-function, which will then render it to our document. Now would be a good time to take a look at that option function, so here’s createUserOption.js:
createUserOption.js
function createUserOption(item, id, field, target) {
    var layout = $('<div>', {class: 'form-row field-' + field})
        .append($('<div>', {class: 'checkbox-row widget-ajax-' + field + '-checkbox'}));
    var checkbox_id = 'id_' + field + '_' + id.toString();
    var input = $('<input>', {
        type: 'checkbox',
        name: field,
        id: checkbox_id,
        checked: true,
        value: item.id
    }).css('display', true);
    var label = $('<label>', {
        for: checkbox_id,
        text: item.label,
        class: 'vCheckboxLabel'
    });
    layout.append(input);
    layout.append(label);
    $(target).append(layout);
}
searchListField.js.
The Views
Our plan is to have a control that when changed will update the data available to another control. In order for any ajax-enabled Django widget to get data from the backend, we will need to issue a request to our Django application and receive a response with desired results. In our case, we are going to issue a request with a query (our search term) and receive a json result. Here’s our ajax view:def get_user_list(request):
if not request.is_ajax():
return HttpResponse(status=404)
query = request.POST.get('search_field')
results = [
{'id': u.id, 'label': u.username}
for u in User.objects.filter(username__icontains=query)
]
return HttpResponse(json.dumps(results))User instance list and then turns that result set into a json string. We are only interested in getting the id and username fields from our models as these will be used to produce a value and label on the front end control side.
Our second view will be the one that the user directly interacts with, the User Search view. It’s a more or less standard Django view with a form (we’ll get into the details of the form later).
The user search view:
def user_search_view(request):
    _form = forms.SelectUserForm
    form = _form()
    context = {}
    if request.method == 'POST':
        form = _form(request.POST)
        if form.is_valid():
            search = form.cleaned_data.get('search_field')
            selected_users = form.cleaned_data.get('selected_users')
            context.update({
                'search': search,
                'selected_users': selected_users,
            })
    context.update({'form': form})
return render(request, 'select_user_form.html', context=context)The Templates
Templates tie together the JavaScript and Python parts of our ajax-enabled Django widget and we have two of them. One template renders the user search form and the other template renders our ajax control. We’ll take a look at the user search form template (select_user_form.html) first:
{% extends 'admin/base_site.html' %}
{% load static %}
{% block extrahead %}
{{ block.super }}
{{ form.media }}
{% endblock %}
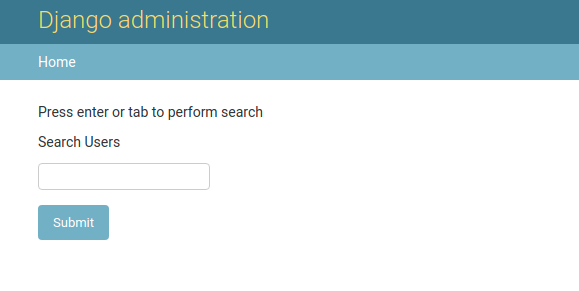
{% block content %}
<form method="post">
{% csrf_token %}
<p>
Press enter or tab to perform search
</p>
<p>
{{ form.search_field.errors }}
<label for="{{ form.search_field.id_for_label }}">Select Users</label>
{{ form.search_field }}
</p>
<input type="submit" value="Submit" />
{% if selected_users %}
<h3>You selected:</h3>
<ul>
{% for user in selected_users %}
<li>{{ user }}</li>
{% endfor %}
</ul>
{% endif %}
</form>
{% endblock %}{{ form.media }} and then the call to {% csrf_token %}. Respectively, these will output includes to our JavaScript and include the csrf_token which we will need for making ajax requests. Other than that, this template is pretty simple. We render the form like a typical form, and output selected users if there are any.
Let’s take a look at the widget template (ajax_search_list.html):
{% load static %}
<div class='widget-ajax-control' style='display: inline;'>
    <input class='widget-ajax-search-text-field'
           data-widget-ajax-url="{% for name, value in widget.attrs.items %}{% if name == 'data_ajax_url' %}{% url value %}{% endif %}{% endfor %}"
           type="{{ widget.type }}"
           name="{{ widget.name }}"
            {% if widget.value != None %} value="{{ widget.value }}"{% endif %}
            {% include "django/forms/widgets/attrs.html" %}
    >
    {% for field in form %}
        <li>{{ field.name }} - {{ widget.attrs.data_field_name }}</li>
        {%  if name == widget.attrs.data_field_name %}
            {{ value.errors }}
        {% endif %}
    {% endfor %}

    <div class='widget-ajax-results results'></div>
</div><div> at the bottom for widget-ajax-results. This div is what will receive our results from our Ajax request. You can see how we target this div (referred to as target on the JavaScript side). This is done by looking for a sibling element to the search field with the class of widget-ajax-results. In this way, we are allowed to have more than one of these widgets in the same form, and they should only update their own result div.